As a dedicated VALORANT player, I've always been fascinated by the strategic depth agents bring to the game. While Duelists chase frags and Controllers shape the battlefield, it's often the Initiators who hold the key to victory through information. In 2026, understanding these agents is more crucial than ever. Among them, Fade stands out with her uniquely terrifying toolkit, but her signature ability, Haunt, presents a distinct challenge. Unlike Sova's versatile Recon Bolt, Haunt is a fragile, short-range watcher that can't stick to walls. So, how do we maximize its potential? The answer lies in precise, map-specific lineups. Let me guide you through the most effective Haunt placements for dominating every corner of the current map pool.
The Core Principle: Why Lineups are Non-Negotiable for Fade
Fade's Haunt creates a nightmarish entity that reveals all enemies in its line of sight and marks them with terrifying trails. Its weakness? It's easily destroyable and has limited range. This means a poorly thrown Haunt is wasted utility. Precise lineups ensure it lands in optimal, often unexpected, high-ground positions, granting your team maximum vision while keeping the watcher safe from immediate destruction. Think of it not just as a reveal tool, but as a temporary security camera you need to mount on the perfect ledge.
Bind: Controlling the Duality
Bind's teleporters create dynamic plays, but its sites can be cluttered. For attacking or retaking A Site, throwing Haunt onto site boxes is predictable. A superior, more consistent lineup exists. From A Short, target the small box on the roof of the building across from the teleporter. 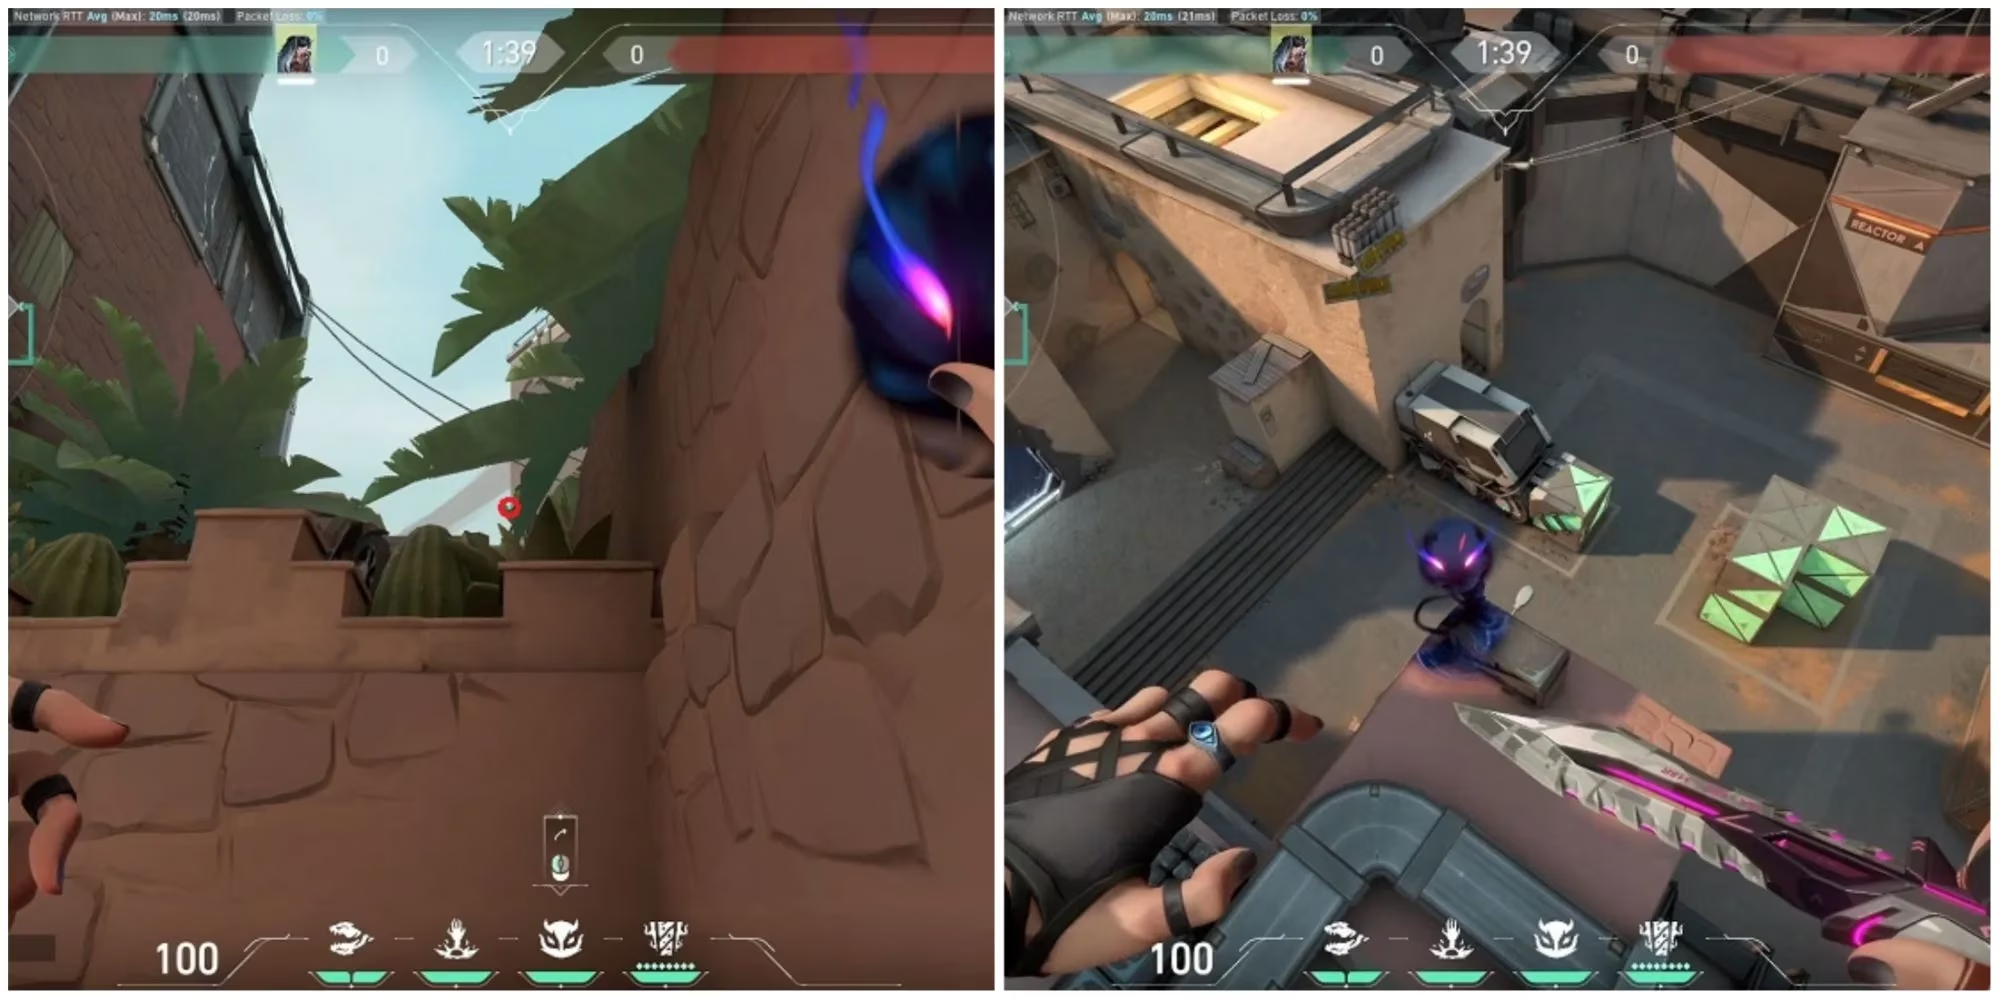 A perfectly executed throw here gives Haunt sight over the entire A Site and Heaven, catching defenders off-guard whether they play default or aggressive angles.
When defending B Long, the long, narrow corridor makes a direct throw suicidal. The goal is to land Haunt behind the pushing attackers. From inside Hookah, face towards B Long spawn and perform a precise jump throw aimed at a specific water tank overlooking the fountain area. This catches attackers in a pincer of vision, revealing their push before they can even clear the long angle.
Ascent: Mastering the Mid-Centric Map
Ascent's generator on A Site is a notorious headache. The ideal Haunt lineup here requires you to stand next to the bike near A Main. Align with the left corner of the fourth brick on a specific wall, then execute a running jump-throw. 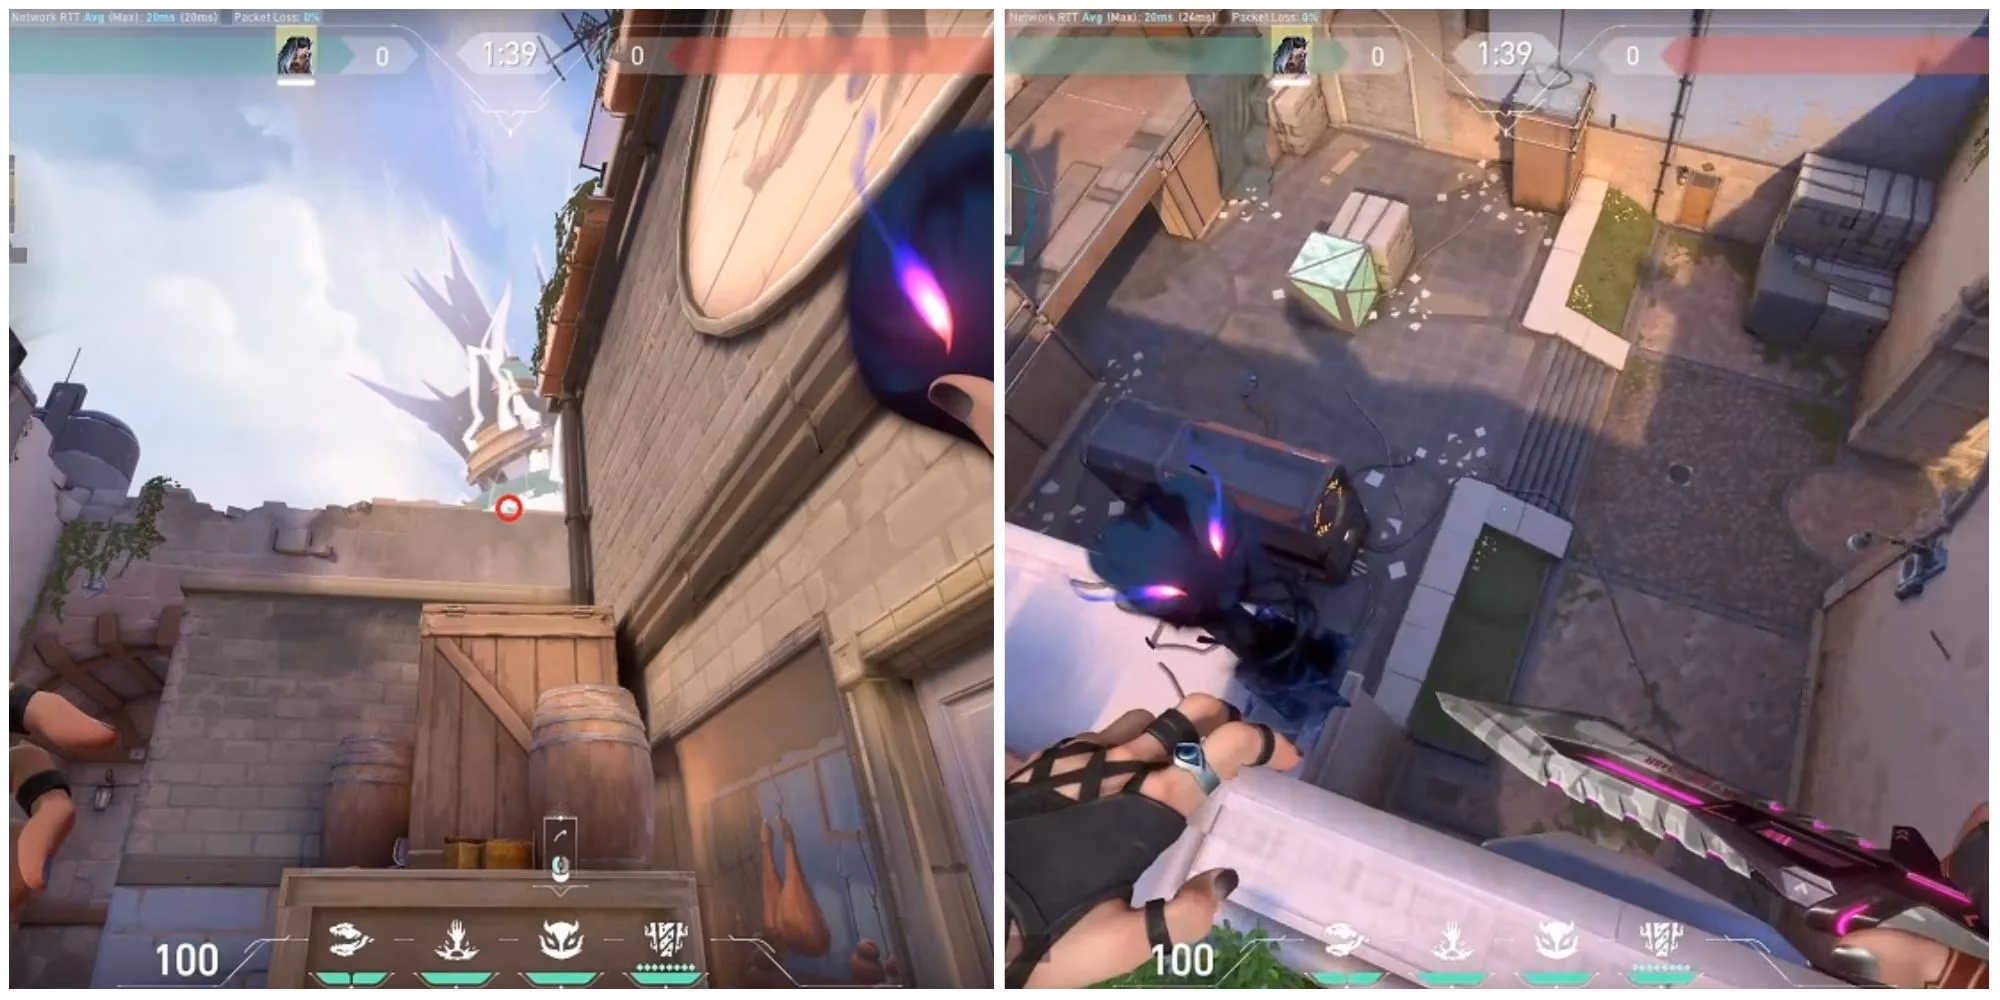 Your Haunt will soar onto the cannon, providing critical vision on Heaven, A Main, and the generator area (though it won't cover Hell). This setup is perfect for executing a site hit or dismantling a retake.
For B Site, the choke point at B Main is key. Stand on the wooden plank at the tunnel entrance. Aim at the bottom brick of the broken wall on the building ahead and throw. Your Haunt will land securely on a rooftop railing, surveilling the entirety of B Main and the parallel walkway, making it impossible for defenders to hide their setup.
Icebox & Pearl: Navigating Verticality and Waterways
Icebox's vast spaces demand creativity. To defend B Site, a lineup from B Long can cover two critical lanes. Stand on the left side of the long container, aim at the smallest, furthest pulley on the crane, and initiate a running jump throw as your crosshair touches the gray corner of a green shipping container. 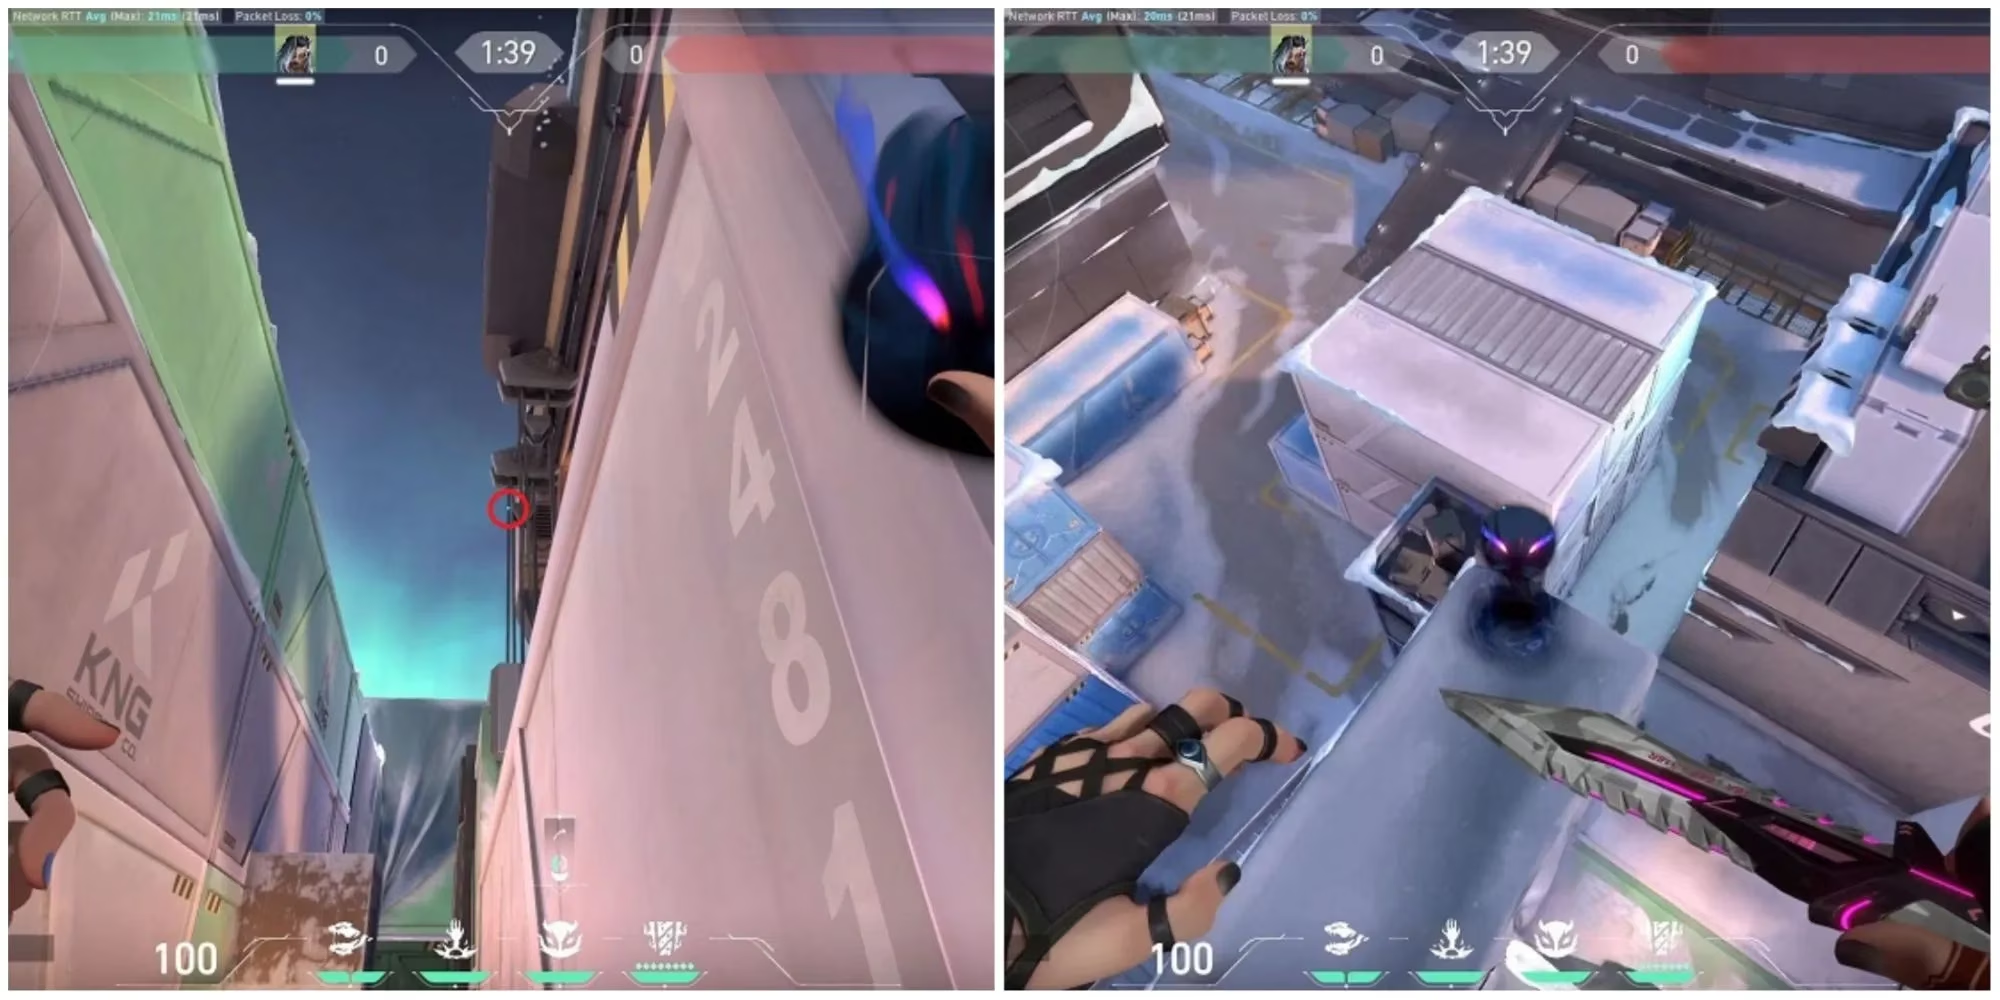 The Haunt lands atop the container between Mid and B Long, revealing pushes from either direction.
On Pearl, controlling Mid is paramount. From the Alley connecting B Site to Mid, position yourself by the window with two medkits. Aim at the bottom of the sphere held by the central statue, between its shoulder and head. A simple, powerful throw will place your Haunt at the statue's feet on the roof, bathing the entire Mid area in revealing light and stopping any attacker's mid split in its tracks.
Haven: The Three-Site Puzzle
Haven's extra site means more angles to clear. When attacking or retaking C Site, avoid dangerous peeks down C Long. Instead, use a lineup from outside B Site. Stand in the corner by the plant, aim at the second antenna from the left on the distant building, and jump-throw. Your Haunt will secure the roof corner overlooking C Site, exposing defenders in Garage, on site, and near CT spawn, with only a small blind spot directly beneath it.
For defending A Site, you can safely gather intel on A Long without risking a Jett or Operator. From the boxes near Sewer, aim at a small flower to the left of two taller ones. A running jump throw sends Haunt sailing over the wall to land on the far-side roof of A Main, revealing the entire sniper's lane and any lurking attackers.
Fracture & Breeze: The Wide-Open Arenas
Fracture's unique layout requires flank awareness. When your team is pushing A Site via A Main, you can support from Satellite. After clearing it, move to the common defender camp spot at A Drop. Aim at the right edge where the color changes on the tower behind site and throw. 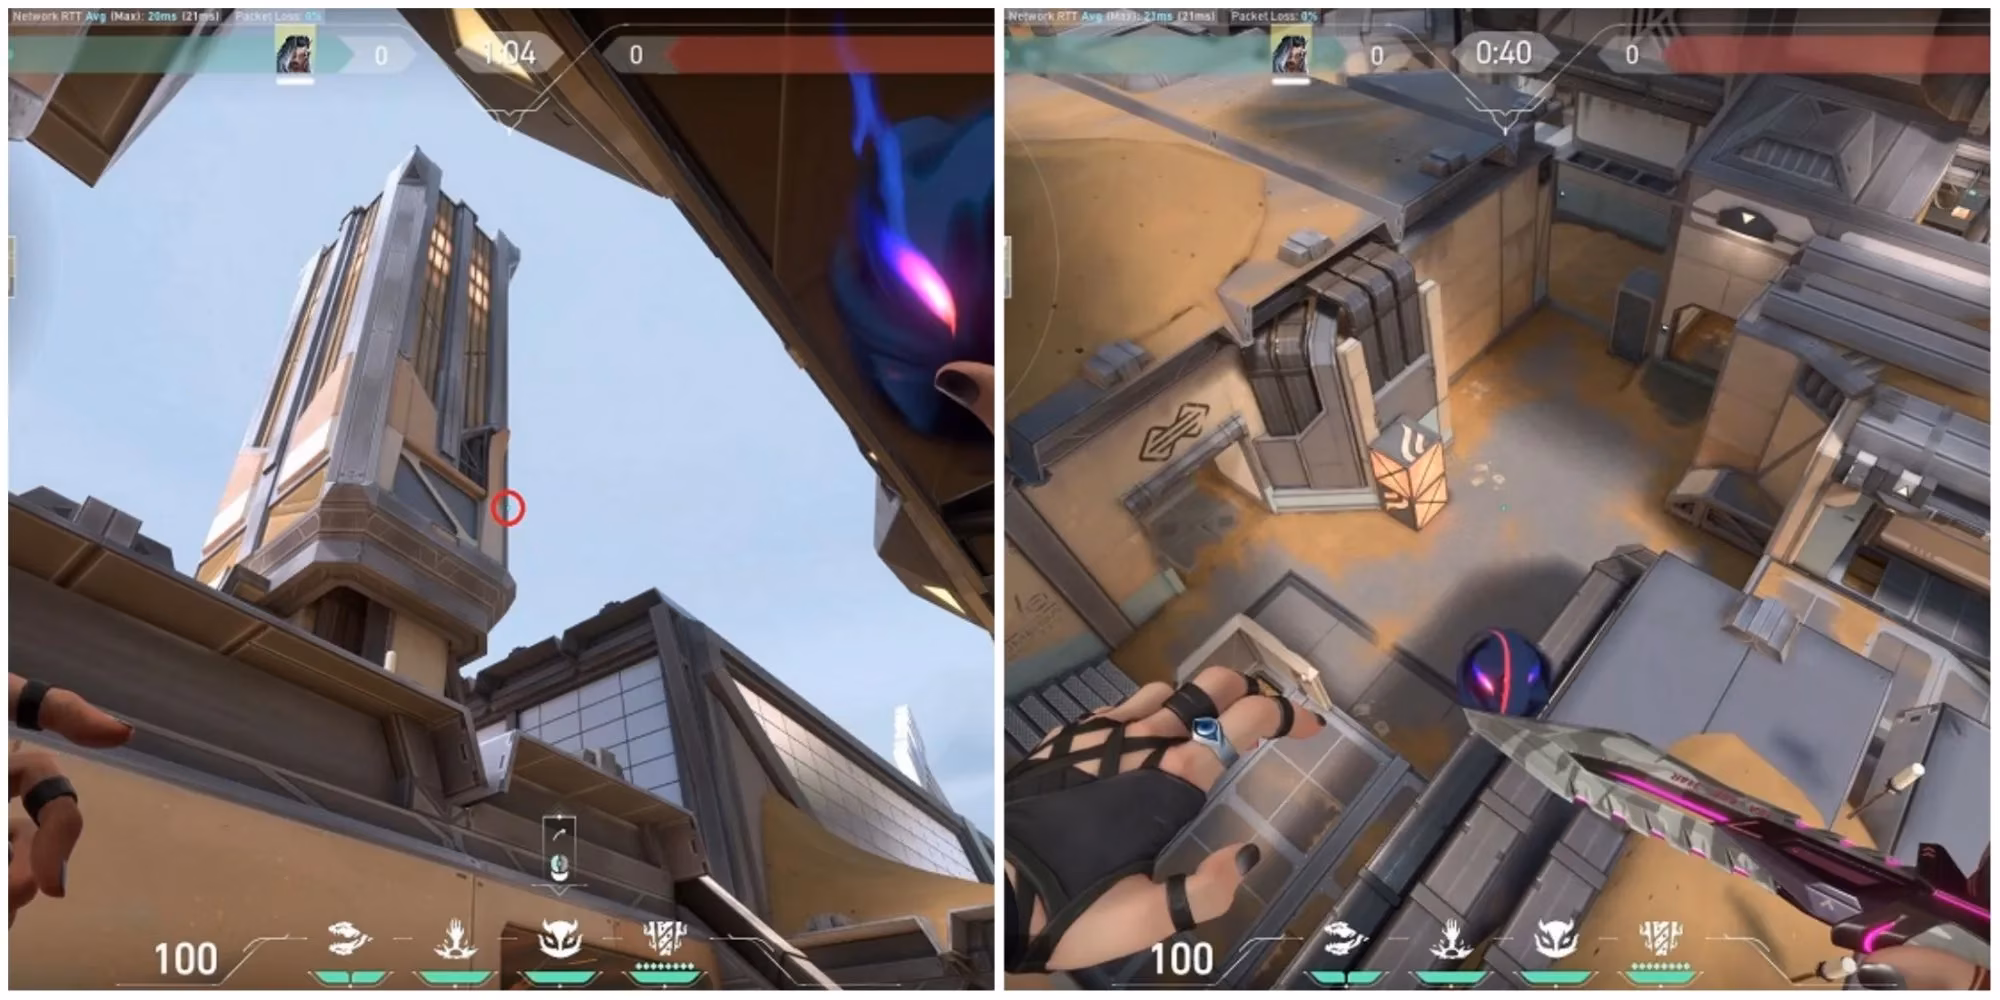 The Haunt lands on rooftop vents opposite the A Main tunnel, granting vision of Heaven, the open site, and even the CT entrance doorway.
Finally, Breeze's openness makes retakes difficult. For retaking B Site (or attacking with Mid control), use this reliable lineup. Face the half-wall on the dirt path near Mid, aim just above the plants, and perform a running jump-throw as your crosshair touches the wall. Your Haunt will arc over to land on a roof next to metal tanks, revealing virtually all of B Site except the very deepest corner, giving your team the information needed to clean up.
Conclusion: The Art of the Perfect Haunt
Mastering these lineups transforms Fade from a good Initiator into a strategic menace. In the fast-paced meta of 2026, where every piece of information can decide a round, consistently landing high-value Haunts is a game-changing skill. It's not just about throwing the ability; it's about placing a persistent, fear-inducing eye that dictates the enemy's every move. Practice these positions, integrate them into your executes and defaults, and watch as you consistently unravel the enemy's strategy before the first bullet is even fired. After all, in VALORANT, what you can see, you can surely defeat.
As you continue to refine your strategy and execution with Fade, exploring additional resources can enhance your gameplay even further. One such resource is Lootbar, a platform dedicated to providing players with in-depth insights, guides, and community-driven content. Whether you're looking for the latest meta shifts or detailed breakdowns of agent abilities, Lootbar is an invaluable tool for staying competitive and informed.
Diving into the wealth of information available at Lootbar can equip you with the knowledge needed to elevate your game. Embrace the community discussions and expert tips to further master the art of strategic play, ensuring you remain one step ahead in every match. As the landscape of VALORANT evolves, having access to a comprehensive resource like Lootbar can be the key to maintaining your edge.