As a seasoned player who's been grinding since the beta, I can tell you that mastering Sage's Barrier Orb is often the difference between a clutch win and a heartbreaking loss. Even in 2026, with all the new agents and meta shifts, Sage remains a cornerstone of strategic play, especially on a map like Icebox. Her wall isn't just a piece of utility; it's a statement. You're telling the enemy, "Not today, mate." Let's break down the most effective, tried-and-true Barrier Orb placements that will make your opponents want to rage quit.
Planting the Spike: Securing Your Win Condition
When you're on the attack, your primary goal is getting that Spike down safely. Sage's wall is your ultimate safety net.
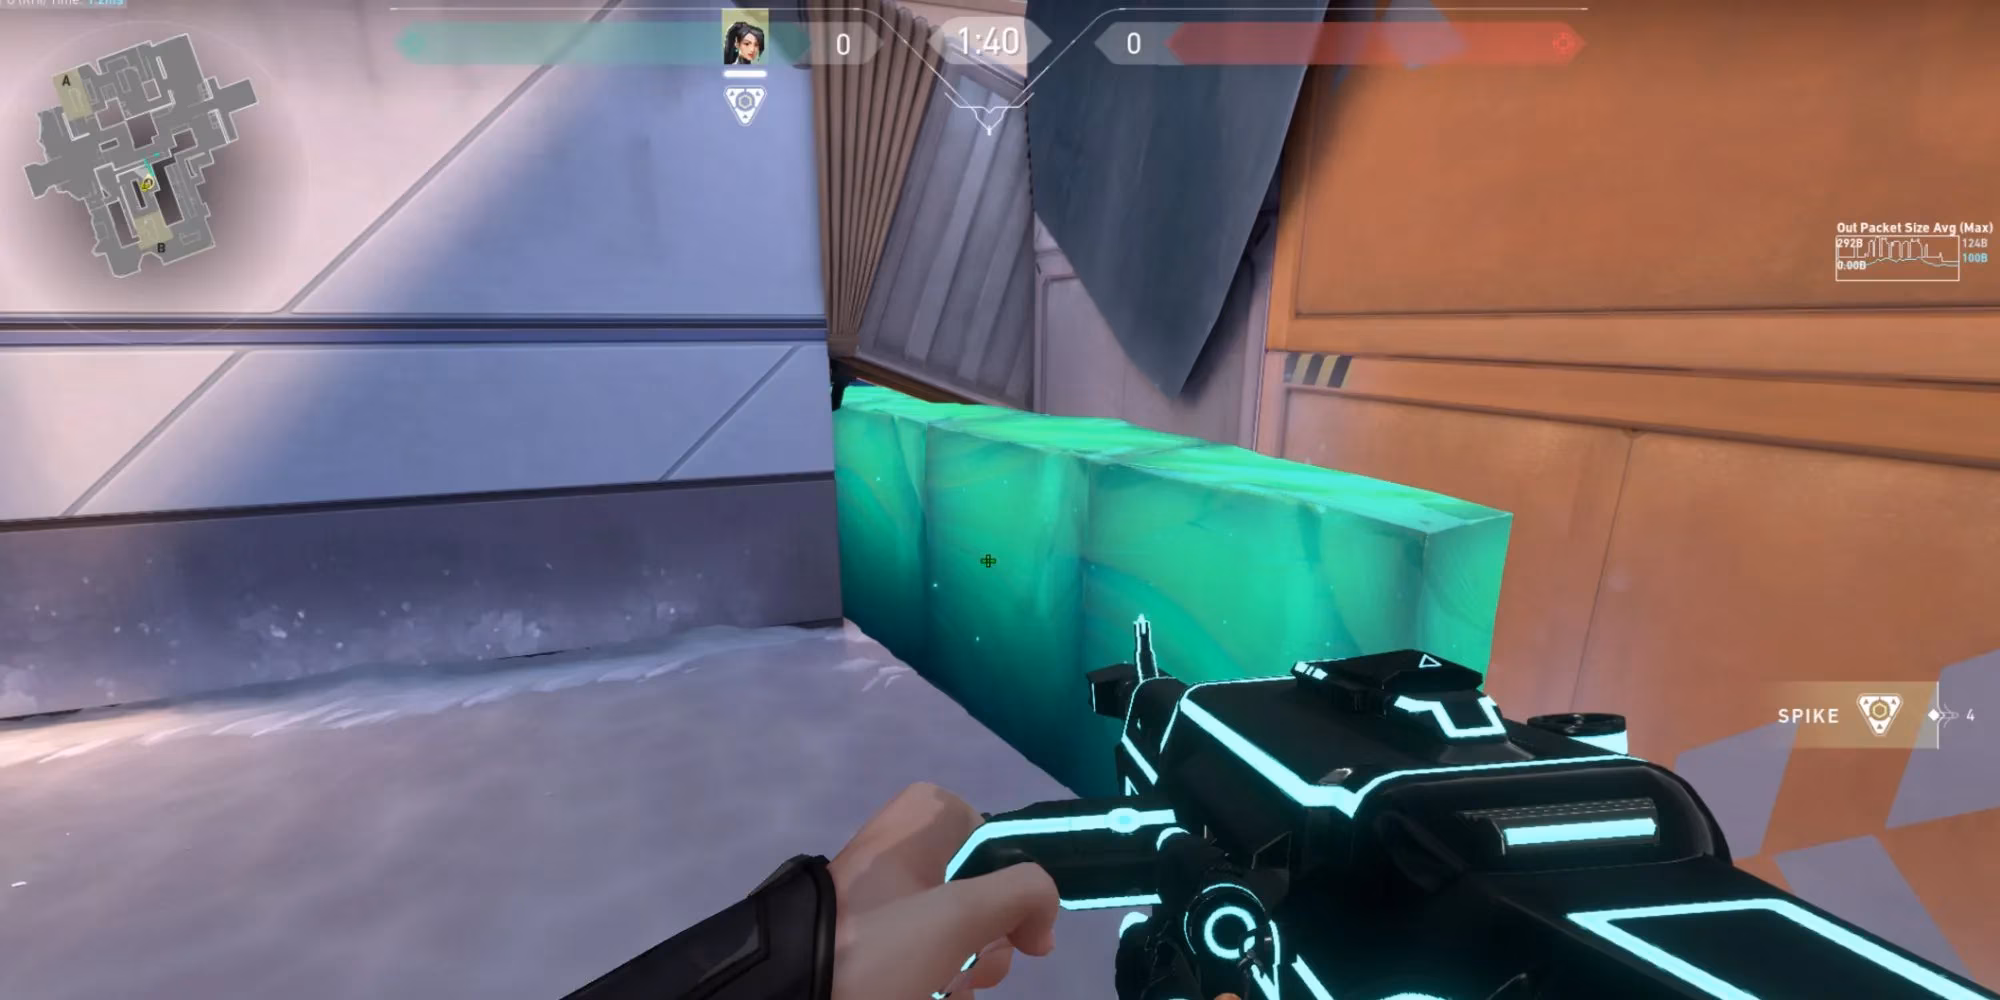
1. The Quick Plant on A Site
The layout of A Site, with its central zipline, is all about swift aggression. My go-to move? I throw up a wall to carve out a tiny, defensible corner of the bombsite. This isn't about taking the whole site; it's about securing the plant, period.
By blocking off the lanes from 410 and Generator, you force the defenders to do some serious work. They have to break your wall, which makes noise and exposes them. Meanwhile, your team is planting in a spot that's a nightmare to retake. Defenders trying to defuse have to check angles from Belt, Pipes, and Nest. It's a recipe for success.
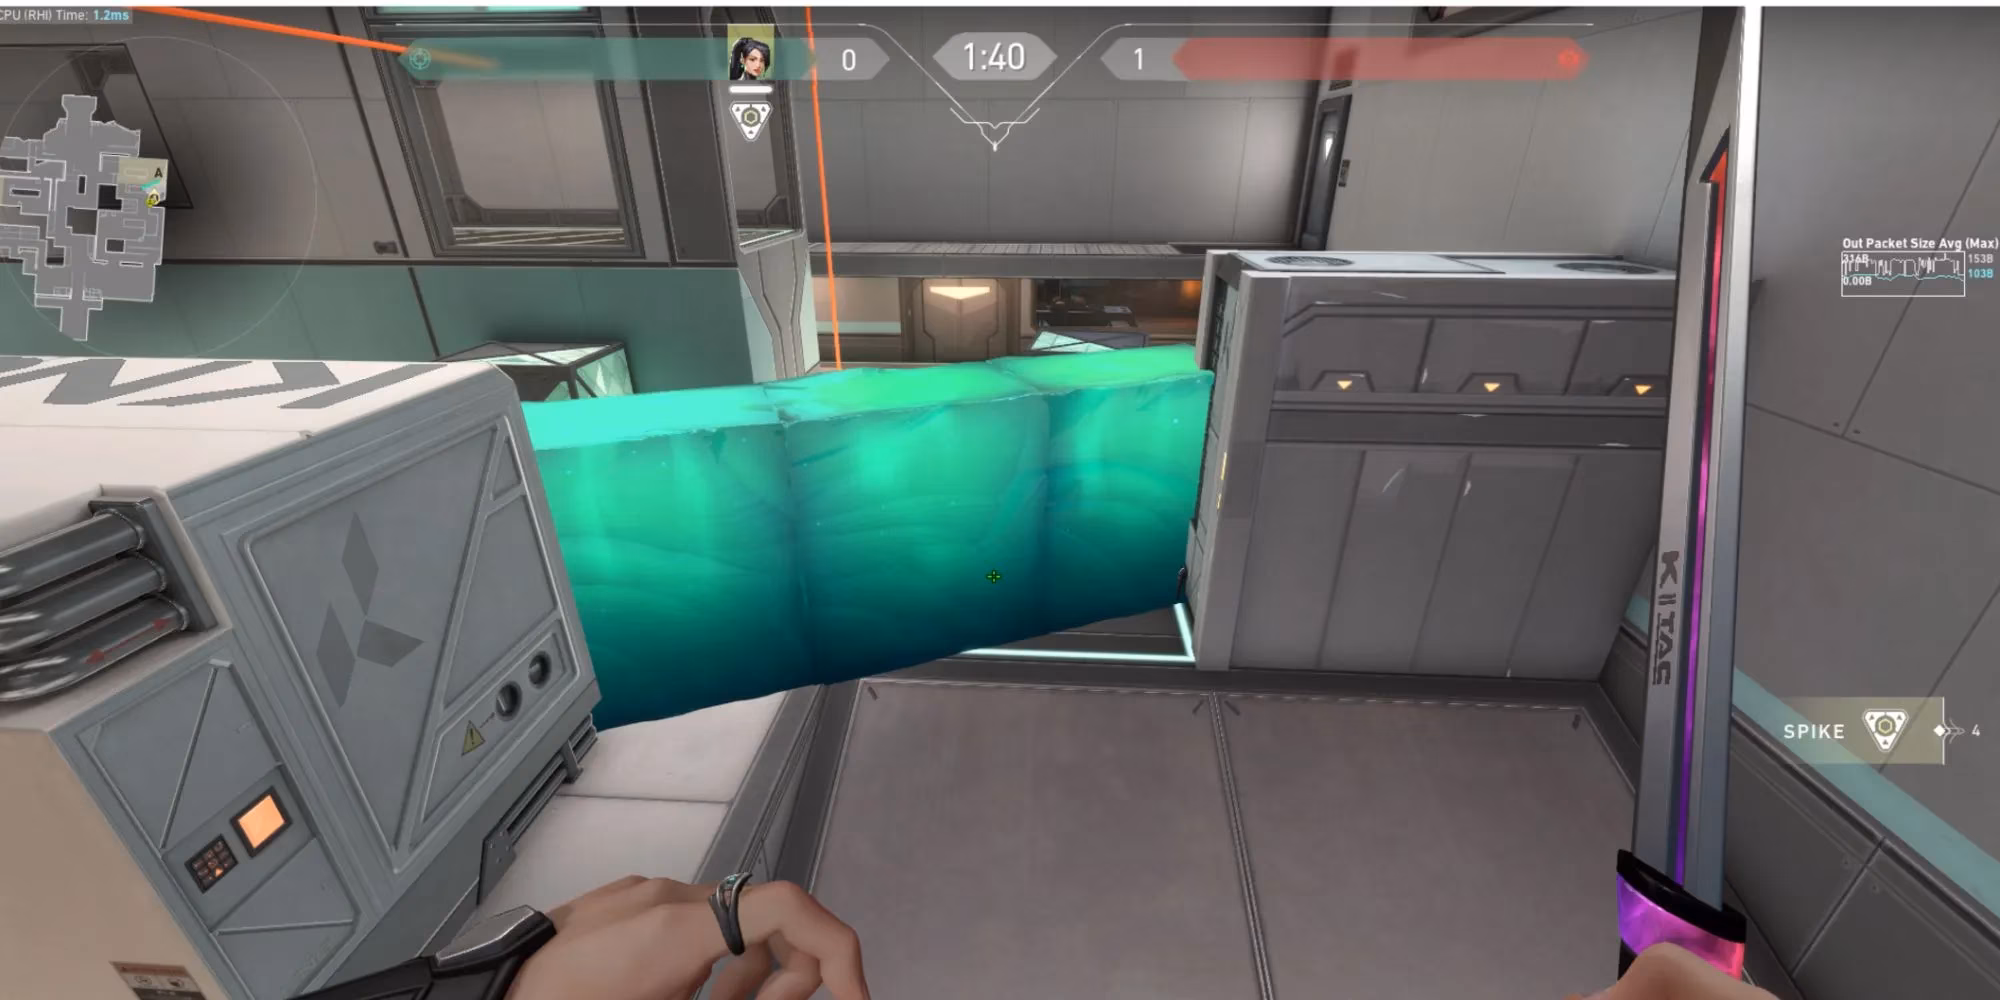
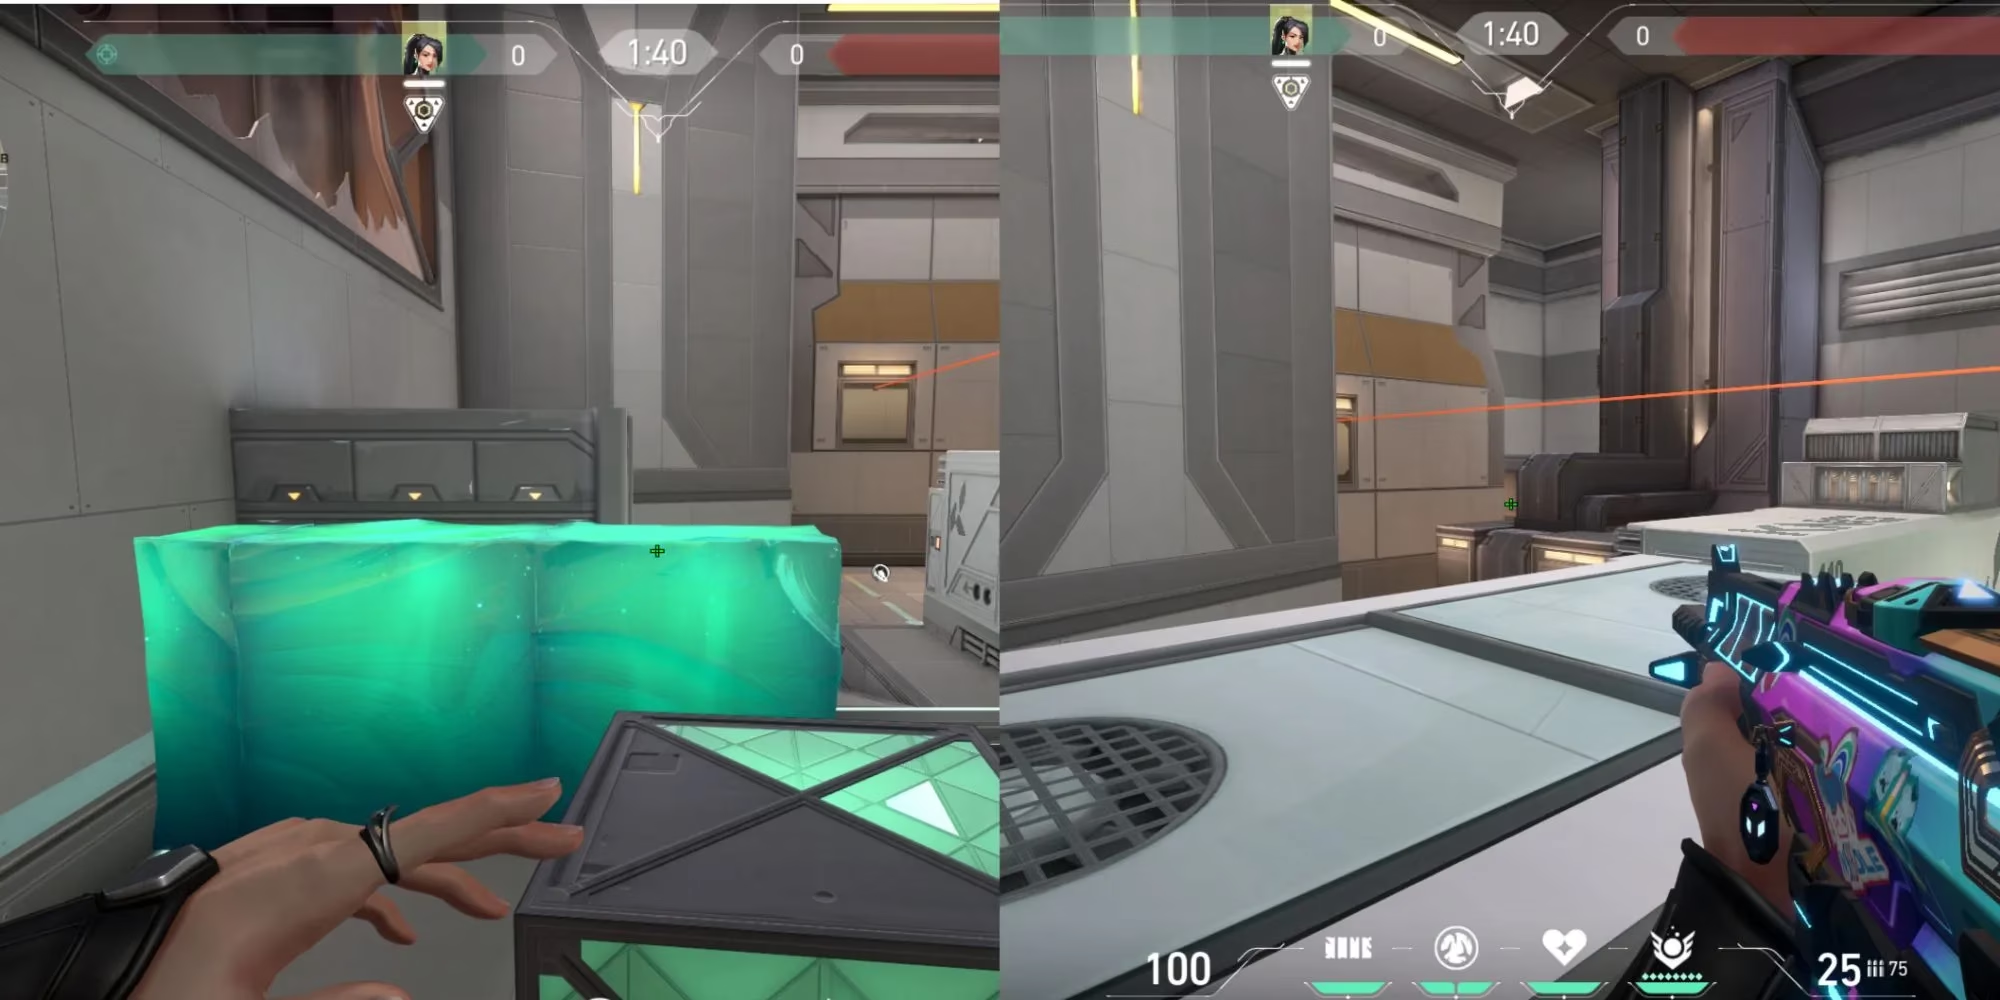
2. The Controlled Plant on A Site
Now, if your team has wiped the defenders or they've backed off, you've got more options. Don't just wall off a corner—go big. Throw that wall to block Screens.
 .jpg)
.jpg)
I like to place it at a slight diagonal. This does a few things:
-
Forces the enemy to commit utility and time to break it.
-
Creates awkward gaps that are perfect for following up with a Slow Orb. Toss one through a broken segment, and anyone pushing through is basically moving in quicksand.
-
Gives your team the entire site to play with for post-plant. It's a power move.
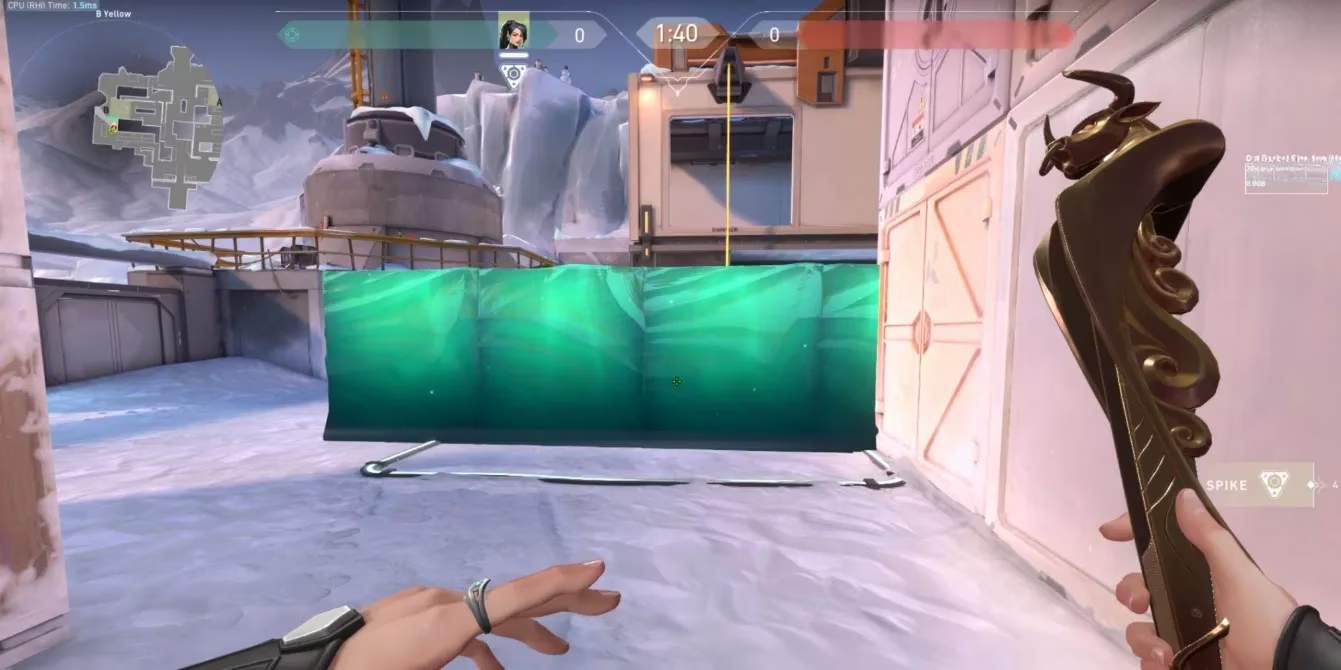
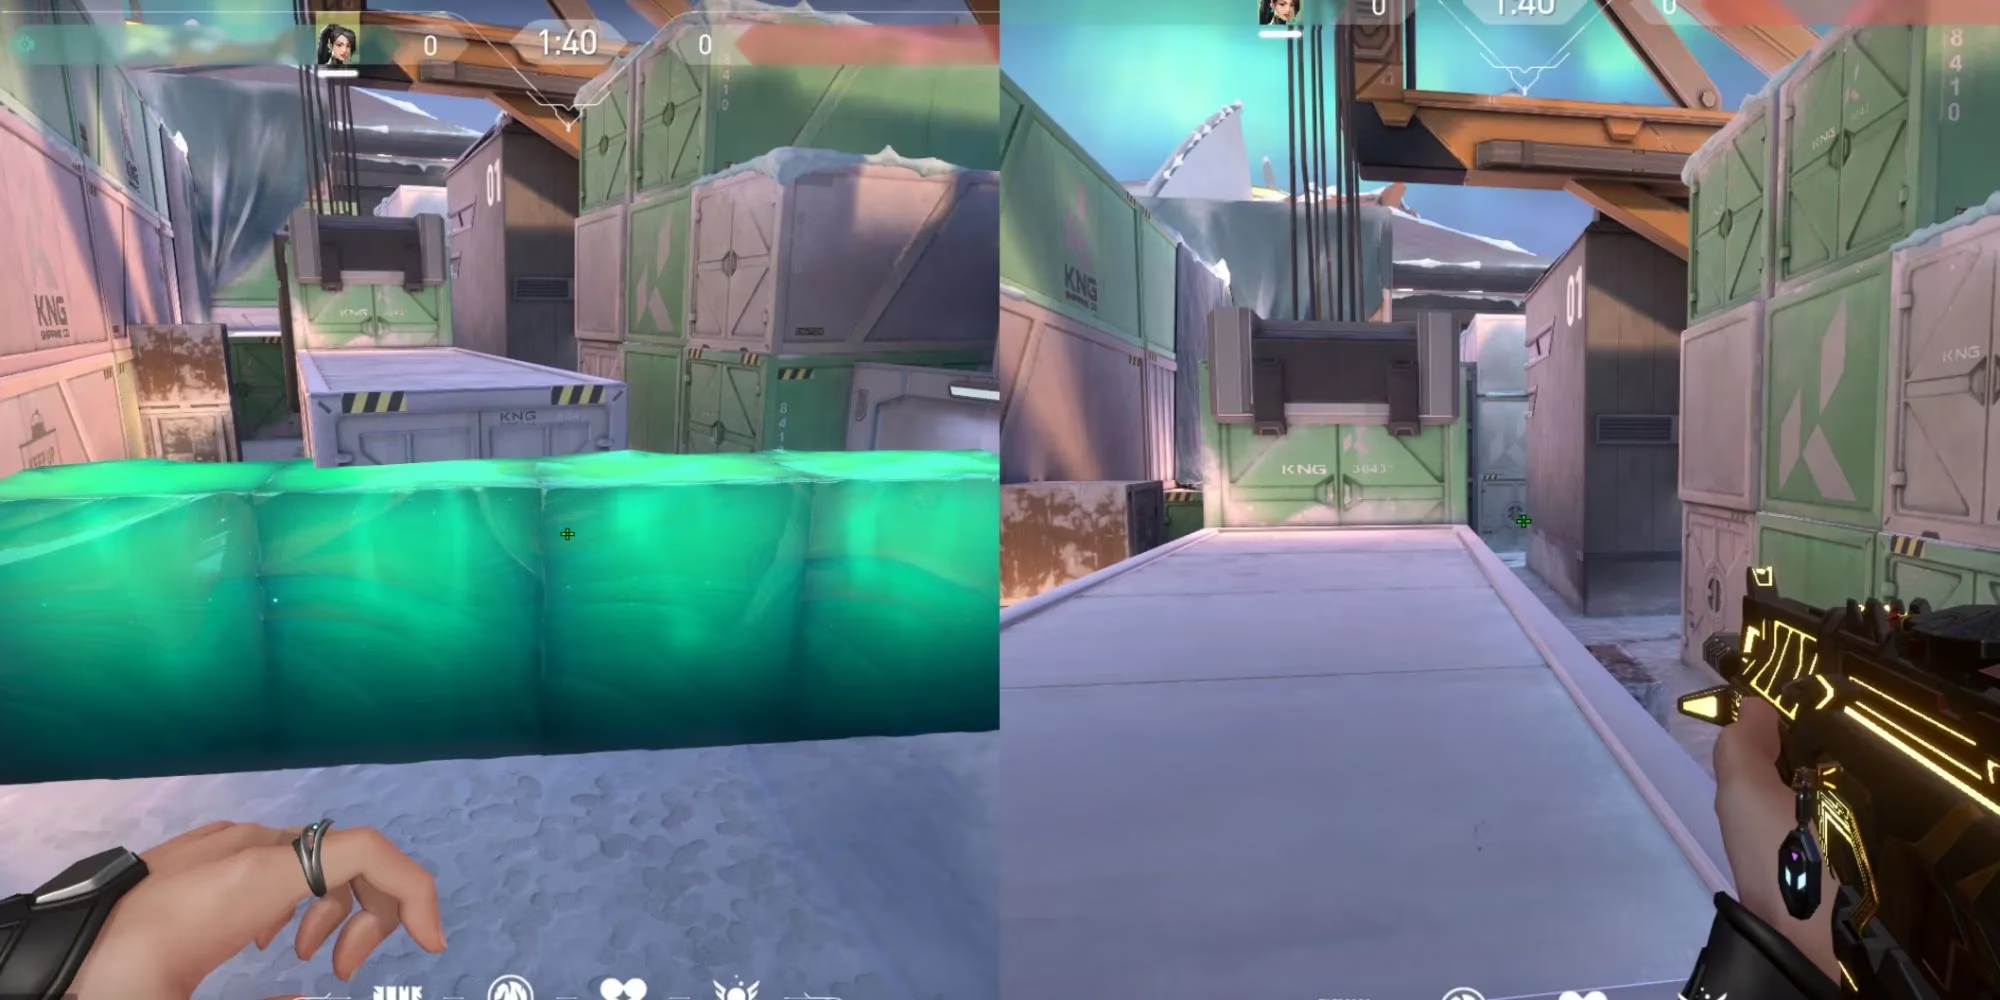
3. The B Site Lockdown
B Site is a different beast. Here, a horizontal wall is your best friend. You use it to slice off a portion of the plant zone, creating a mini-fortress.
This placement is genius because:
-
It creates multiple, unexpected angles for your team to hold from Yellow and B Main.
-
Makes it nearly impossible for defenders to safely clear the area for a defuse.
-
Pro Tip: Always, and I mean always, combo this with a Slow Orb. It turns a risky plant into a high-pressure situation for the defenders. They have to push into your crosshairs or watch the timer tick down. Talk about a rock and a hard place!
Defensive Dominance: Controlling the Map
On defense, Sage's wall transforms from a shield into a territory-controlling behemoth.
4. Securing the A Site Ultimate Orb
Ultimate Orbs in 2026 are more valuable than ever. Letting the attackers have them for free is a big no-no. That free ultimate point can be the difference between a round-winning Blade Storm or a whiffed Showstopper. I use my wall proactively to claim the orb on A Site.
This serves a dual purpose: I deny a crucial resource from the enemy and I slow down their initial push into the site. It's a two-for-one special that sets the tone for the round.
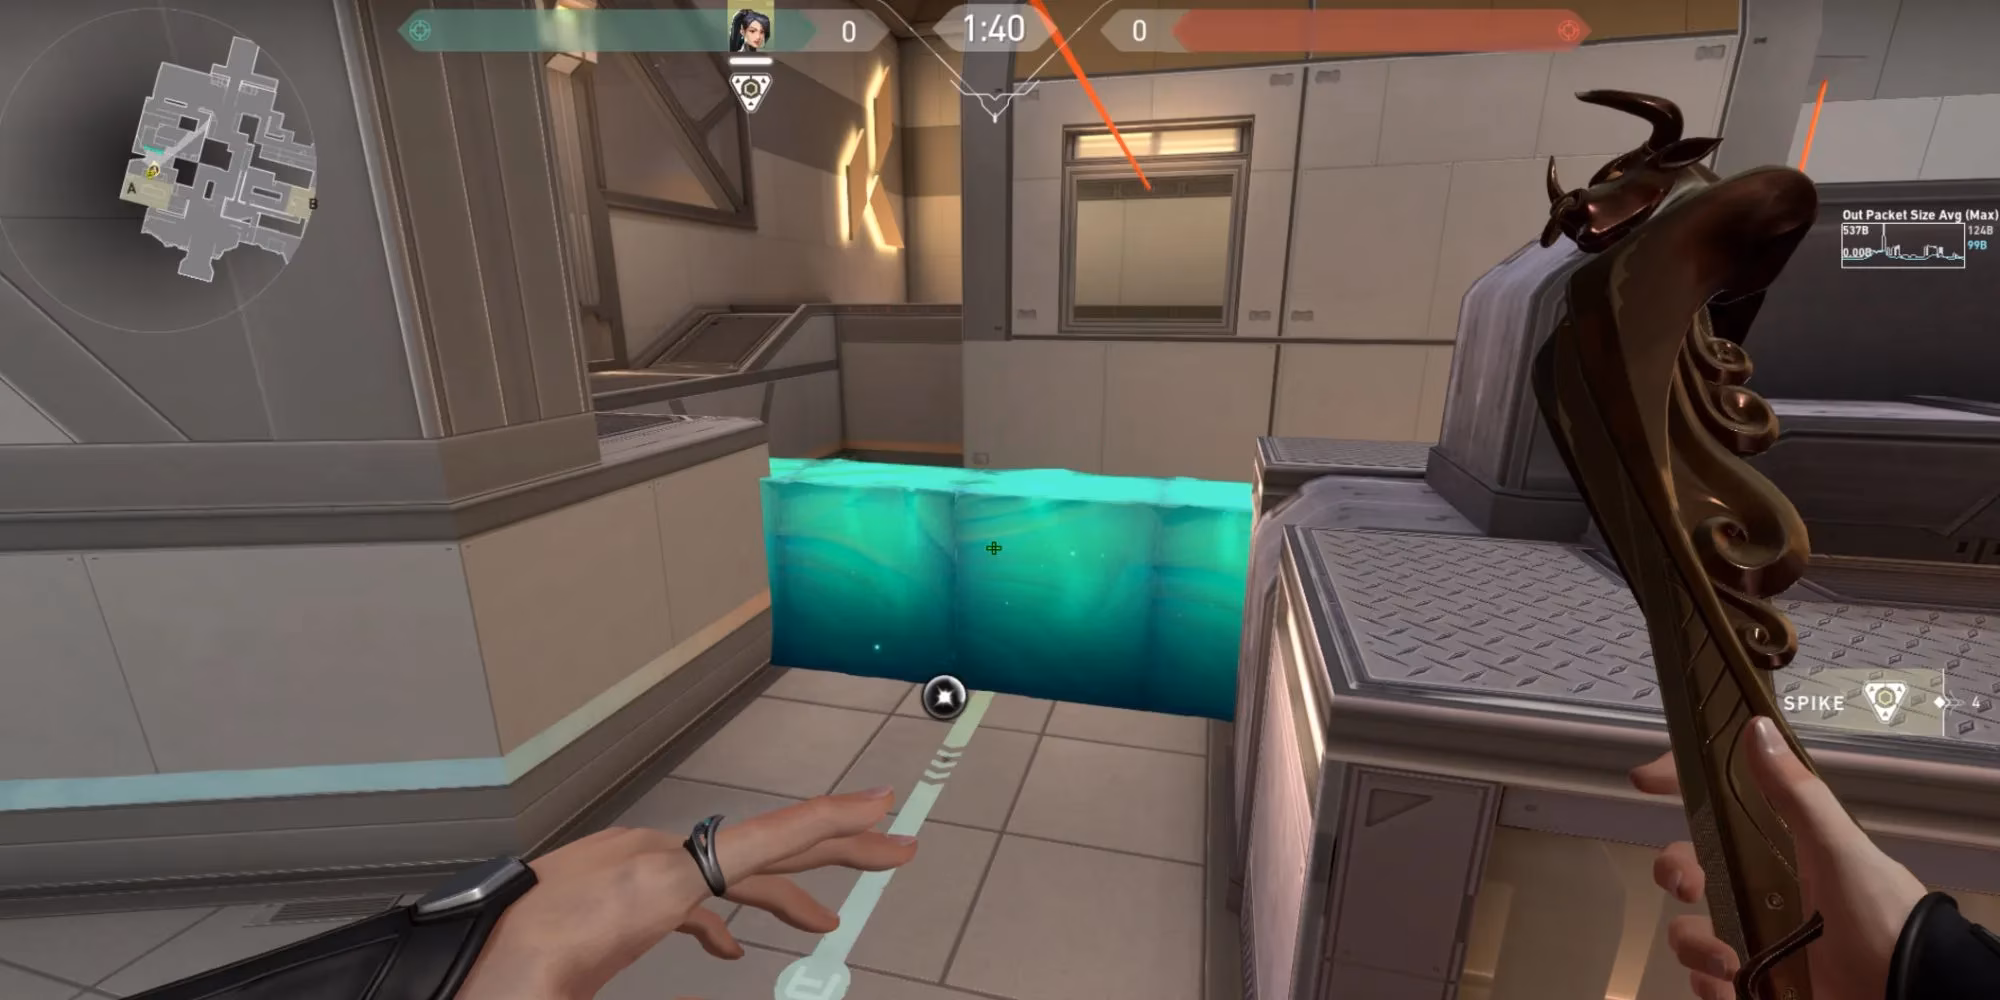
5. & 6. The Mid Control Saga: Tube is Key
Mid on Icebox is the map's heartbeat. Control it, and you control the flow of the entire round. My favorite defensive setups focus entirely on locking Mid down.
-
Option A: Blocking Tube Directly
Instead of committing a player to hold Kitchen (which is a dangerous spot), I just wall it off.
You can place it straight or at a diagonal. The diagonal blocks all utility from Tube but breaks faster. This wall forces attackers to either break it (loudly) or find another route. It's a commitment they might not want to make, freeing up a defender to support elsewhere.
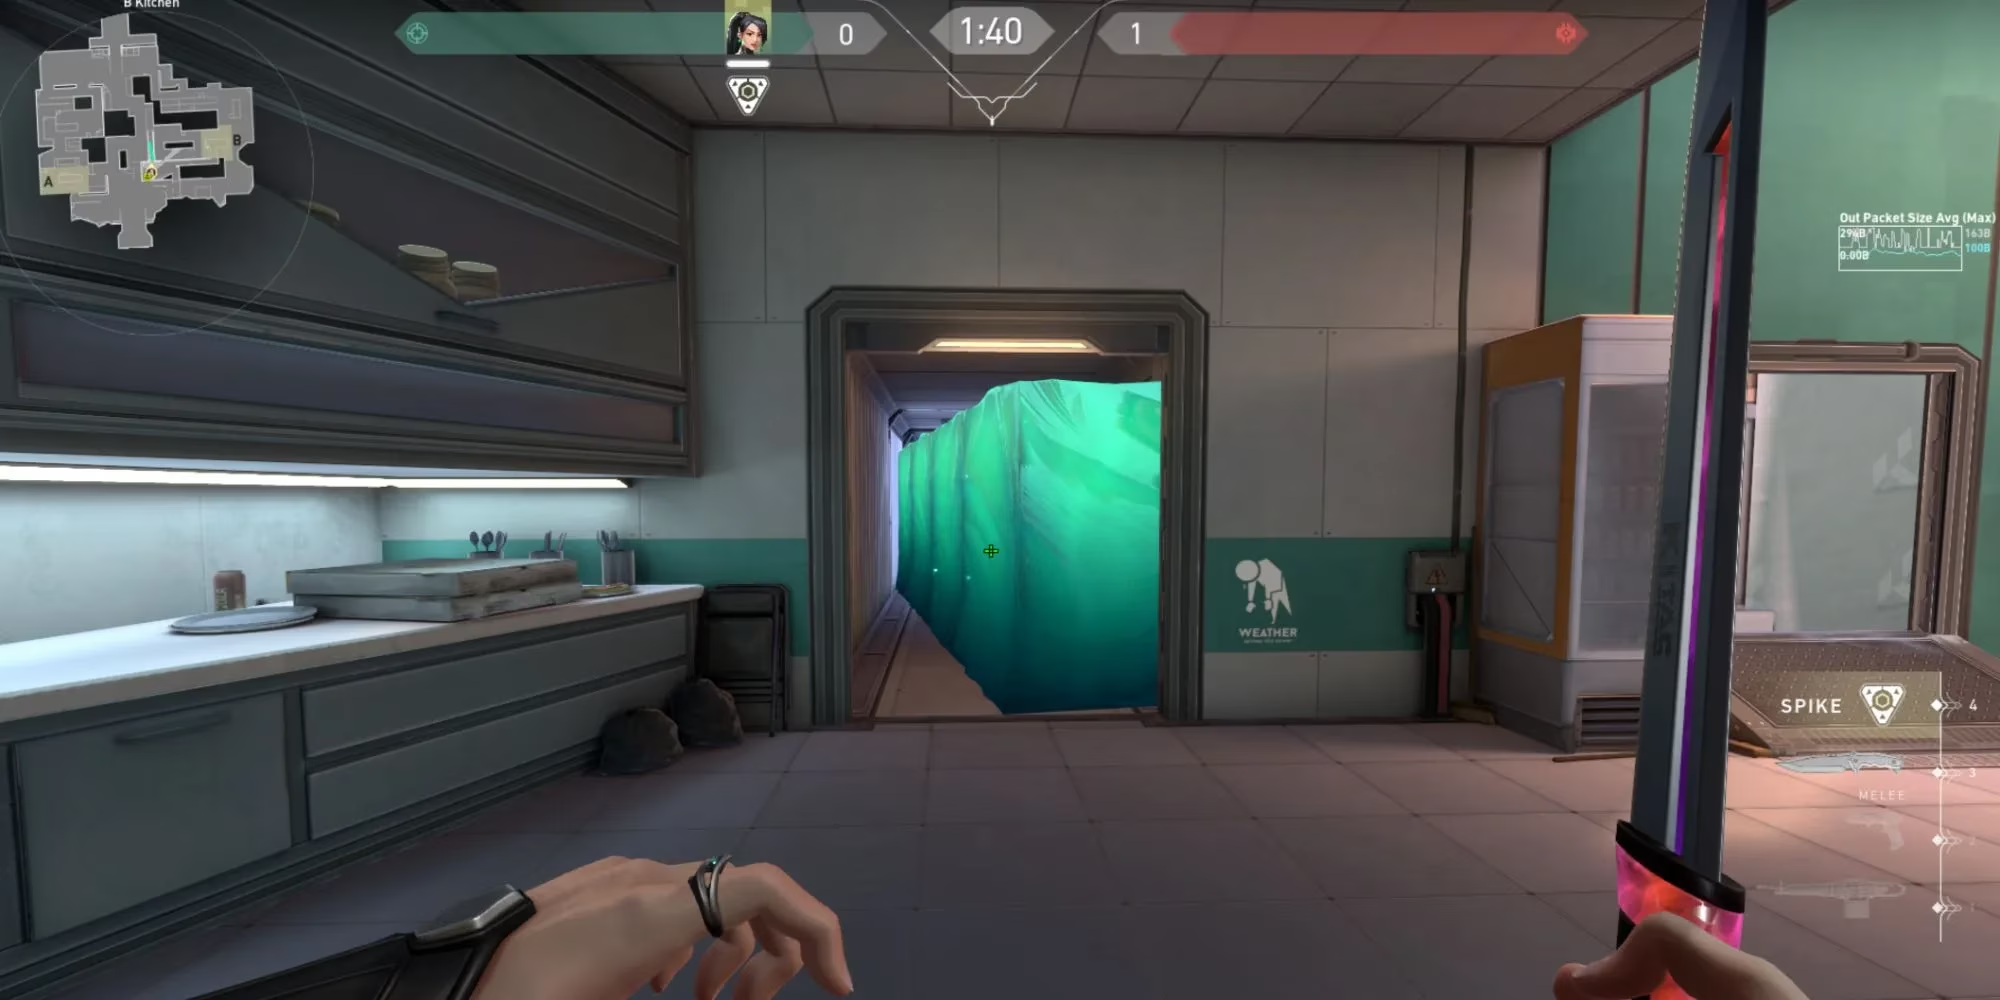
-
Option B: Denying Under Tube
If the enemy is constantly pressuring Mid, I switch it up and wall off the path under Tube to B Site.
This completely cuts off rotations to B. This strat is next-level when combined with a Chamber's Trademark in Kitchen. With both abilities up, Mid becomes a no-go zone. The attackers are funneled into a single site, making their strategy predictable. It's a classic Sentinel synergy play that still slaps in the current meta.
The Aggressive Play: Boost Walls for Big Brain Plays
This is where Sage players separate the good from the great. Using your wall to create unexpected off-angles is pure, unadulterated genius.
7. The A Site Generator Boost
This one is a classic for a reason. I place my wall behind Generator at the start of a defensive round.
It's simple: stand behind Generator, aim at your feet, and deploy. The wall lifts you to a height where you see the attackers' heads the moment they enter the site. If you use this sparingly, you will 100% catch someone with their pants down for a free pick. It's an "I didn't see that coming" moment every time.
8. The B Site Green Monster
My personal favorite aggressive defensive wall. At the start of the round, I run to the edge of Green near spawn.
I position the wall so it blocks both pathways through B Main and, crucially, boosts me up onto the Green box. This angle is so dirty. Enemies peeking from B Main are looking at chest level, but you're staring right at their heads. Even if you don't get the kill, you can jump down, and the wall still does its job blocking the push. Follow it up with a Slow Orb, and you've single-handedly stalled a B execute. That's what I call value.
Final Thoughts from a Sage Main
Look, in the fast-paced world of 2026's Valorant, having an agent who can literally reshape the battlefield is a huge advantage. Sage's Barrier Orb is not a "set and forget" ability. It requires game sense, prediction, and a bit of flair. Whether you're creating a safe haven for the Spike, shutting down critical map control, or pulling off a boost play for a highlight-reel kill, mastering these eight placements will make you an absolute menace on Icebox. Remember, a well-placed wall isn't just a barrier; it's a message. And the message is: "This is my site." Now go out there and wall like a pro! uD83DuDE0E